Showing posts with label sewing. Show all posts

Friday, January 25, 2013

Christmas Sewing...I know It's a Bit Late But...

I've been really having a lot of fun this past month or so.  I have been in creative mode and have gotten quite a few projects crossed off my "To Do" list.  I have so much stuff that it's gonna take three or four posts with lots of pics just to show it all.  :)

I decided that I would start with stuff I specifically made for Christmas this year.  I finally convinced everyone that we really needed new Christmas stockings (seriously, I've been trying for years), so I was hectically sewing and knitting them two days before Christmas.  Gotta love those last minute projects.  :)

 I made two of these.  One for Al and one for Alex's girlfriend.

This is Alex's "Nightmare Before Christmas" stocking.

 Scott wanted a knitted blue and white striped stocking.  Because he wanted it knitted, I didn't get this one done until a few days after Christmas.

This is Hannah's Stocking.

\
 And this is mine.  This one didn't get done until after Christmas either.

I also finally decided how to decorate the plain Jane Christmas tree skirt that my mom gave me years ago (with the expectation that I would decorate it with pretty things.  Better late than never, huh?)  I hand embroidered fun felt ornaments on the tree skirt.  When I look at it in the photo, I'm still not sure it's completely done, but it's done for this year.  :)


Her are a few close ups of the ornaments.

I have lots more stuff to share--embroidery, sewing, knitting, jewelry, Barbie clothes (yeah, you read it right, it's my latest fun distraction)--so keep checking back.  :)

Wednesday, October 31, 2012

Making a New Wallet and Coin Purse

I've been wanting a new colorful wallet for a long time.  Brown leather is just not me.  :)  I looked and looked for one to buy but they were all either really big or really boring or really expensive. So I told myself, "Self, there are so many cool tutorials on the internet, you should be able to find one for a wallet you could sew out of fun fabric!"
After way too many a few hours of searching, I found this great tutorial from Modest Maven that looked like it would be almost exactly what I wanted.  The only problem was that it only had 6 slots for cards.  Well...I have a lot more cards than that.  For heaven's sake, I have two library cards!  So I decided that I would do a slight modification to the wallet to give me more card slots.  This is what I came up with.
Hah!  Nothing boring about these colors, huh?

I added a center section with more card slots.


Here's a better view of the inside.  There are 6 card slots on this side of the wallet and six more on the other side.  There's a pocket for bills along the top edge too.

Of course, once I finished sewing it, I started to move everything from my old wallet to my new one and hmmm...I still had too many cards for all the slots.  Everyone wants you to have their store loyalty card and since I'm cheap I like to save money, sometimes I don't say no.  :)
After many hours of pondering and looking online, I came up with an idea of an accordian pocket that I could sew right in the center of the wallet to store some of the extra cards I didn't have room for.  Out came the seam ripper so I could take the center section out and remake it with the pocket.  A little cutting, a little sewing, a little straining of brain matter, and after an hour or so here's what I had.


The only thing I didn't do was put in a little zippered pocket for change.  I decided it might be better to have a separate coin purse so the wallet didn't burst its seams.  :)

Later the same night, I decided to make said coin purse but got distracted when I did a search for coin purse tutorials.  I found this tutorial on CraftPassion for a really, really cool coin purse made with a zipper and ribbon.  Of course, I had to make it!  After all, we needed something to hold coins in the car too.  :)  What do you think?

Unzipped...

Zipped!  Isn't it cute?

I love projects like these!  They're quick and lots of fun to make.  My only problem is that I want to make a lot more--there are SO many cool tutorials online now!  I'm constantly amazed at the brilliance and creativity of people's brains.  :)

Tuesday, February 14, 2012

Finally...New Post, New Curtains, New Lights

Well, it's about time, huh?  It's been way too long since I last posted.  The days are flying by and what seemed like a month and a half has really been 3 months.  Yikes!

I've been in a "nesting" mood since the beginning of the year.  We've lived in this house for over 3 1/2 years and I decided it was time to finally get to some projects that had been put off and put off.  So, we rearranged the living room and I decided to make some new curtains to replace the ones I made from sheets when we first moved here.  It was sometimes fun, sometimes very frustrating, and sometimes just funny (as in I can't believe how brainless hormones have made me) but they got finished and hung and I like them.

Kitchen curtains made from Crate and Barrel dish towels.

Living room curtains made from white Ikea curtains with an added border of fun fabrics.
The dining room slider has a curtain just like these.

Hubs decided to do some projects too and made me my mason jar lights I've been wanting to put in the kitchen.  He had a brainstorm about what hardware to use to mount them--industrial surface mount conduit and electrical boxes--and I think they turned out spectacularly!!

 LIght over sink.

 Lights over the peninsula.

 All lit up.  Sorry it's not a better picture--it was hard to get it to turn out at all.

There's still a lot of accessorizing I 'd like to get finished so that the living room looks put together.  A rug, pillows, pictures for the walls, pretty things on the shelves...I'm kind of in a lull right now but I've set a deadline so hopefully that will spur me on to fffffinish.


Tuesday, November 8, 2011

Making Stuff...Or What to Do When Your Washing Machine Breaks

Actually, I started this project before the washer broke but it's been a good stress reliever and distraction when I've gotten sick of trying to research how to repair it or replace it.  Especially since the projects I had planned to work on were put on hold because of not having a washing machine.  :)

Last week when I went to my painting class, I noticed a couple of people who had these neat paint brush holders that stand up when you unfold them.  I really liked them but they're only available in black and black is way to boring for me so I decided to try to make one that's more colorful.  It took a  little while to figure out how to design and sew it but over the course of the week I came up with a good plan for it and I finished it in time to take it to painting class tonight.

Here is the holder all folded up and ready to go.

Here is a picure of the inside.

Here it is when the top is folded back so it stands up.

I also made a zippered bag out of the black and white fabric to hold other miscellaneous painting stuff so, along with my big red canvas bag that holds all my stuff, I'm quite the coordinated painter these days.  :) 

I should have another post by tomorrow night of some new paintings.  I'm too tired tonight to set up the camera and tripod.  :)


Sunday, November 28, 2010

Studio Dreaming

 It's getting closer!  All the drywall is up in the new studio and once the drywall inspection is done next Wed., we can start the final slog through taping and mudding and painting and all the other myriad of stuff that needs to be done to finish this project. 


 I've had a basic floor plan for all the furnishings and storage stuff for a long time but this weekend I pulled it out again and spent way too much some time rethinking everything.  I moved a few things around in the sewing area so I can make room for a bigger ironing area and more shelves for fabric and drew some elevation drawings so I could see where I could find room for small storage on the walls.   There are still a few areas that need some rethinking but I'm getting close.  Now I can think about the making it pretty part.  :)

 Ive been having a lot of fun this weekend checking out blogs showing all kinds of sewing and craft studios.  Tons of great inspiration out there!  I thought I'd share a few of my favorites.

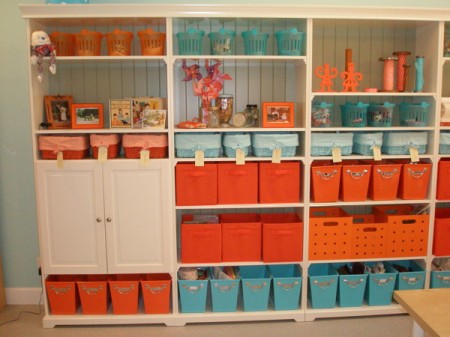
Anna Lena's studio
library-2421
Love the colors and all the neat organization here!  She must have read my mind because these are the colors I'm wanting to use for my new studio.  Are you cringing at the orange, Y?                              our-studio-03
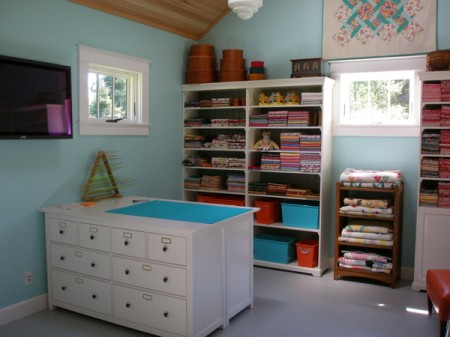
I really love this cutting table!  Look at all the storage!  Drool, drool, drool...  For more pics, click here.

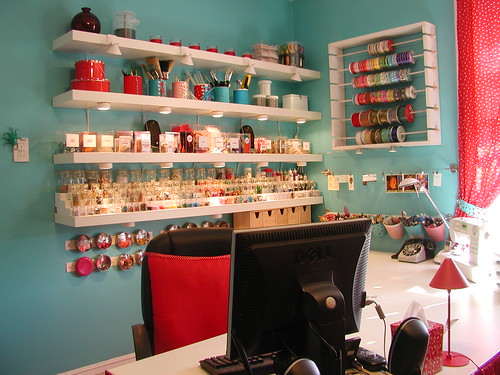
Crafty Intentions studio                Desk Surface by Crafty Intentions
Absolutely love the colors in this studio.  In fact, it inspired me to make the curtains and chair cover that I did for the studio before we tore it down.  And I love the wall with all the glass bottles for storing cool stuff.  Also, you can't see it well in this picture, but click here to see a closer picture of the cool tin can corsets and to see lots more pics of this great studio.

Allsorts studio
   Hutch3
Another really wonderful studio.  for more, click here.

Modkidboutique studio                   studio5
Isn't it fab?  So colorful and neat!  And I love the cutting table.  It's made from two Ikea shelves tipped on their sides.  Very tempting to make one for my studio!  For more, click here.

I can't decide if these studios inspire me or discourage me.  I think it's a bit of both.  :)  I know that my studio will never be as pretty as the ones above because...well, I'm too messy and some of the stuff I have to store would be impossible to make pretty.  But, I still plan to try and make my space as pretty as I can...Ikea here I come.    

Saturday, April 3, 2010

Yes, Virginia, There Are Some Things You Should Never Bother Doing...Or Why I'm an Idiot

This
plus
this
equals insanity

It all started with my trip to Arizona in February.  I needed new underwear and didn't have time or fabric to sew them so I bought some to take with me.  Even though I bought the "right" size, they were too big, so after the trip, I washed them and put them aside in the studio.  I figured it would be quick and easy to take the waistband elastic off of them, sew the side seams smaller, cut off an inch at the top and re-attach the elastic.   Ummm....DON'T EVER LET ANYONE TALK YOU INTO DOING SUCH AN IDIOTIC THING! 

Each pair took 40 minutes just to get the elastic off and then another 20 minutes to resew.  10 hours later, I finished my "quick and easy" project.  Even if I only paid myself minimum wage, I still might have been able to buy some really nice undies with the time I spent redoing these.  I think I'm going to have to stop procrastinating on finding some good quality fabric for making lingerie so that I'm never tempted to repeat this particular idiocy.

Just as a side note, I really can't believe I'm blogging about this either!  I think I've gone totally over the edge!